
[ad_1]

File storage web site Dropbox affords a device designed to allow you to create and share particular sorts of content material with colleagues and different professionals. Known as Dropbox Capture, the device means that you can file your display, digital camera and microphone to create video messages, audio recordings, screenshots and extra. After devising the particular sort of content material, you’ll be able to share it with different folks.
Why use Dropbox Capture as an alternative of one other device? The aim behind this program is that can assist you keep away from pointless conferences or convention calls anytime you might want to convey or share one thing with workforce members and different colleagues. As a couple of examples, you need to use Dropbox Capture to create and share a software program tutorial, a gross sales proposal, a design format or standing updates for a particular mission.
Dropbox Capture is accessible on all Dropbox plans, although the quantity of recording time varies based mostly in your plan. Users of Dropbox Basic, Plus and Family plans can file as much as two hours with no restrict on particular person recordings. Users of Dropbox Professional, Standard, Advanced and Enterprise plans have limitless recording time as much as their storage restrict.
Install Dropbox Capture
To get began, obtain the Dropbox Capture program for Windows from the Dropbox web site. After putting in the software program, log in together with your Dropbox account, after which, give this system permission to hook up with your account.
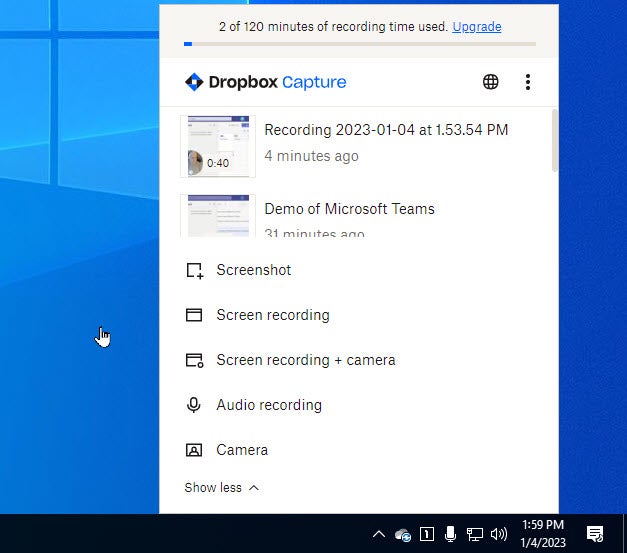
Dropbox Capture opens from its icon on the taskbar displaying the several types of actions you’ll be able to carry out, corresponding to screenshot, display recording and display recording plus digital camera. Click Show extra to see different actions, together with audio recording and digital camera. A thumbnail video seems within the middle. Click the Play button for the video to look at a short tutorial (Figure A).
Figure A

Take a screenshot
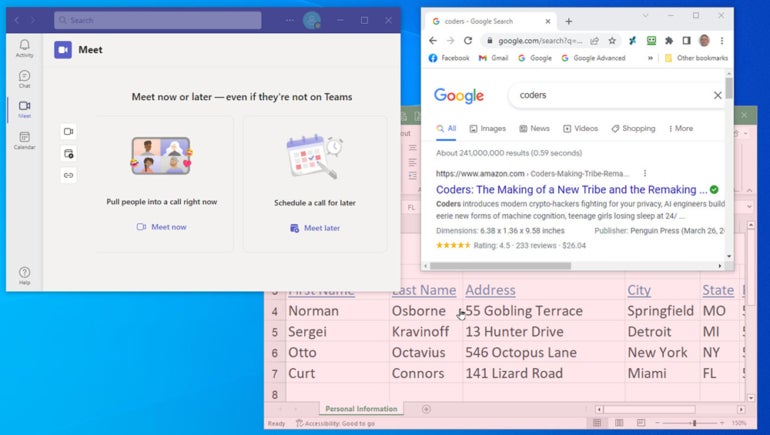
With Dropbox Capture, you’ll be able to take a screenshot of your whole display, any space you choose or a particular window. From the Capture window, click on the primary possibility for Screenshot, or press the Print Screen key. You can click on or press Enter to seize your whole display, or click on and drag together with your mouse to seize a sure space of the display. To take a screenshot of a particular window, press the spacebar, transfer your mouse pointer to the window you wish to seize (which then turns pink) and click on your mouse (Figure B).
Figure B
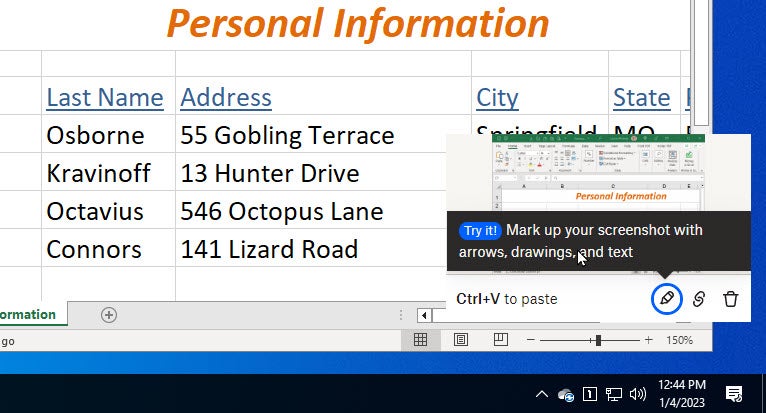
After you are taking the screenshot, the ensuing picture seems within the decrease proper nook of the display. To mark up the picture, click on the Markup button (Figure C).
Figure C
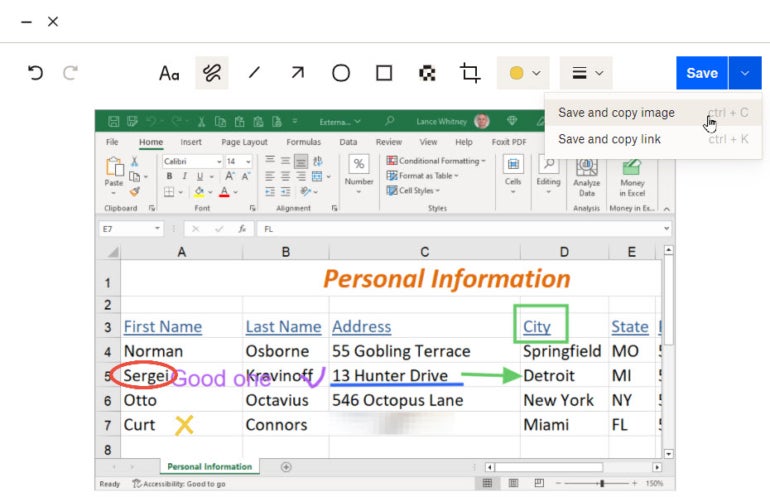
The picture opens in a window with a device set on the high. From the icons, you’ll be able to add textual content, strains, arrows, circles, squares and blurs. You may even change the width and colour of the strains, crop the picture and undo your final motion (Figure D). When executed, click on Save, or click on the down arrow, and choose Save and duplicate picture or Save and duplicate hyperlink. Anyone with the hyperlink can then view the screenshot.
Figure D
Record your display
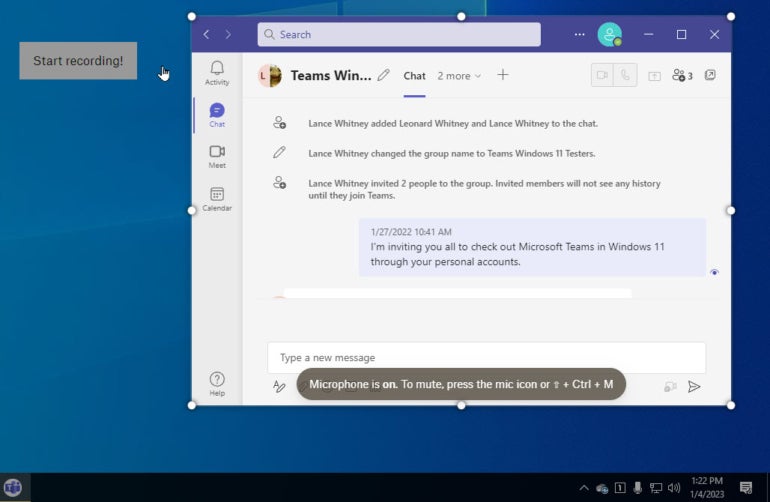
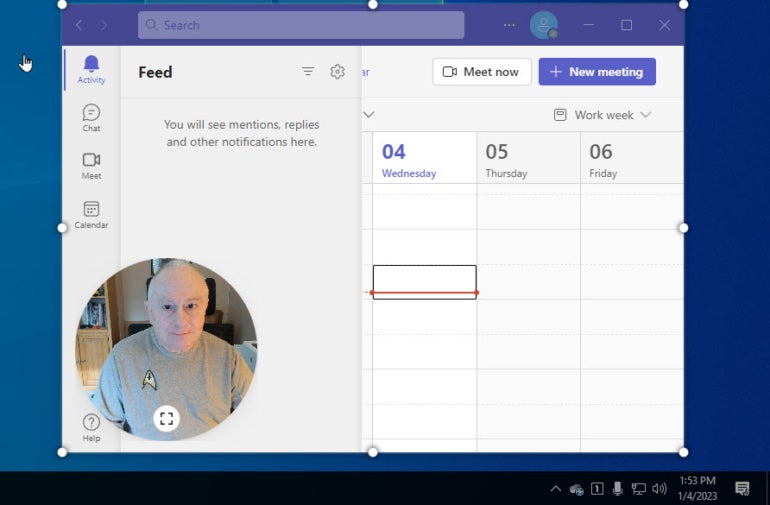
Next, you’ll be able to file your display as a video. From the Capture window, click on the choice for Screen recording. Then, click on or press Enter to file your whole display, or click on and drag together with your mouse to file a sure space of display exercise. Similar to the screenshot operate, you can even press the spacebar to file a particular window, then transfer your mouse pointer to the window you wish to file and click on your mouse. Click the Start button to start out the recording (Figure E).
Figure E
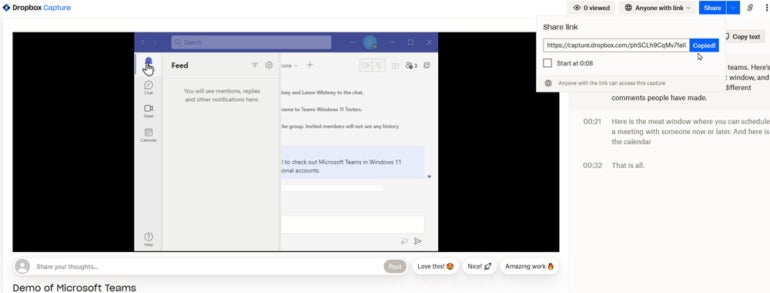
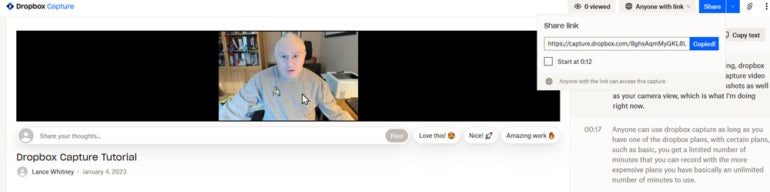
While the recording is energetic, click on the pencil icon to attract on the display recording. When executed, click on the Stop button. The video is generated and displayed in a Dropbox Capture webpage. From right here, you’ll be able to play the video, rename it, view a transcript of the audio and share a hyperlink to the video. You may also obtain the video as an MP4 file. People with whom you share the hyperlink can then play the video and depart feedback about it (Figure F).
Figure F
Record your display and your self
If you want to file a video of your self narrating the display recording, click on the choice for Screen recording + digital camera. Click or press Enter to file your whole display; drag together with your mouse to file a sure space of display exercise; or press the spacebar to decide on and file a particular window. Click the Start button to start out the recording (Figure G).
Figure G
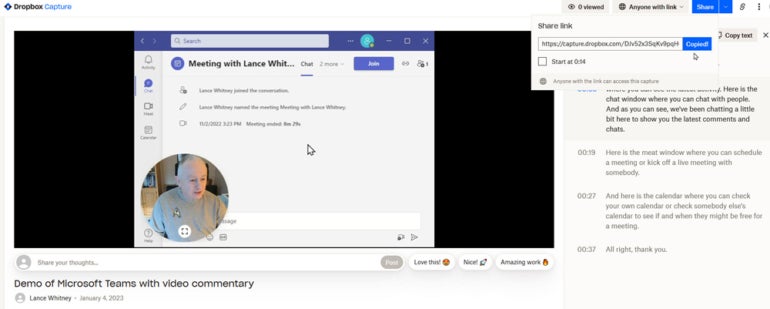
The markup and sharing course of is similar as with an everyday display recording. While the recording is energetic, you’ll be able to click on the pencil icon to attract on the display recording. Once completed, the video will show as a Dropbox Capture webpage. From right here, you’ll be able to play the video, rename it, view a transcript of the audio, and share a hyperlink to the video or put it aside as an MP4 file. People with whom you share the hyperlink can then play the video and depart feedback about it (Figure H).
Figure H
Create an audio recording
To file simply audio, click on the Show extra hyperlink and choose Audio recording. Press the beginning button to start out the recording. Then, communicate or play the audio you want to file (Figure I).
Figure I
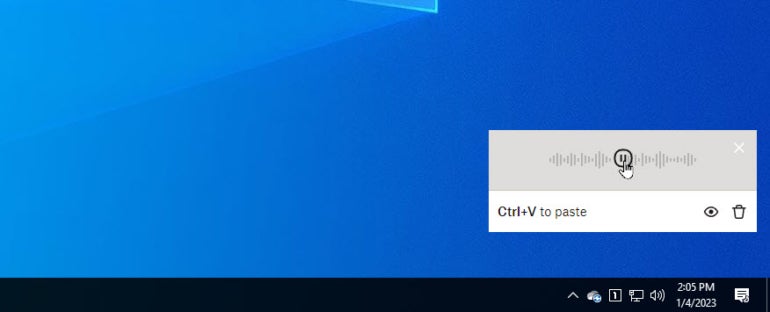
When you’re completed, press the Stop button, and a participant window will seem (Figure J). Click the Play button to take heed to the recording, or click on the View button to see and listen to the recording in a Dropbox webpage. From there, you’ll be able to share the recording with different folks through a hyperlink.
Figure J
Record your self
If you want to merely file your self or somebody or one thing else together with your PC’s digital camera, select the choice for Camera. Position your self or one other topic, and click on the Start button. When executed, click on Stop. The video then seems in a webpage the place you’ll be able to play it, view the transcript and share it with different folks (Figure Okay).
Figure Okay
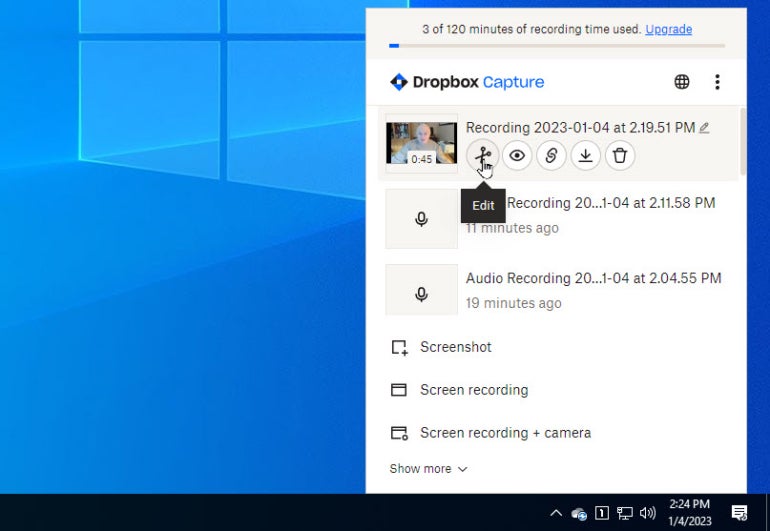
The Dropbox Capture window retains observe of all of your recordings. Hovering your mouse over a particular recording will produce a toolbar with choices to edit or view the recording, copy its hyperlink, obtain it or delete it (Figure L).
Figure L
Use Dropbox Capture your approach
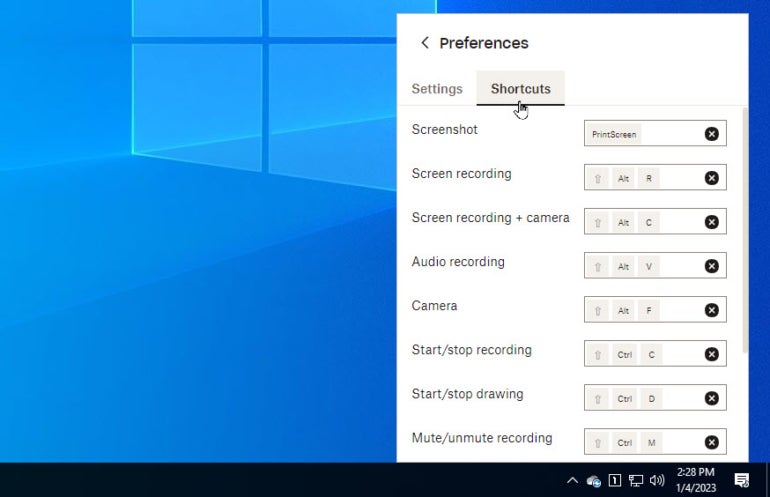
If you need, you’ll be able to tweak among the choices for Dropbox Capture. At the Capture window, click on the three-dot icon on the high, and choose Preferences. On the Settings tab, you’re in a position to change the digital camera, audio supply, video decision and different choices. And on the Shortcuts tab, you’ll be able to change the shortcuts that set off totally different actions (Figure M).
Figure M
Lance Whitney shares extra ideas for Dropbox right here: How to make use of Dropbox Transfer to securely share recordsdata with different folks and use Dropbox Backup to again up your recordsdata to the cloud.
[ad_2]